A Dev's Journey Through the AI Landscape: How I use ChatGPT to write my Python documentation.

Article / 26 March 2023

Introduction

ChatGPT has revolutionized productivity in various fields including game development. Its capabilities have made it possible to complete tasks much more efficiently, leaving developers with more time to focus on what they love – writing code (for now :D). However, I find that this increase in productivity has a downside for me: it has become difficult to know when to stop and take a break. 

The more and more I was writing this article, it began to feel like a journaling exercise for myself, attempting to put words to some of the thoughts and concerns I have about this new technology. I will try to set aside the anxiety-inducing aspects of the rapidly evolving AI landscape. With AI technologies bombarding us daily and progress appearing to be exponential, it raises significant questions about what this means for humans and our inherent need to feel useful. 

Instead, I'll share my personal experience with using ChatGPT and one of the ways I use it to write Python docstrings and document my code, as well as offer a glimpse into the challenges I've faced in finding the right balance between productivity and well-being in this new era of accelerated efficiency.

Efficient Python Documentation with ChatGPT 

One of the most time-consuming tasks for a developer is writing docstrings for their functions, or at least it was for me: it becomes monotonous which leads to boredom, it interrupts the flow of coding since I need to switch my focus from writing code to document it, and not just that but some functions may involve complex logic or algorithms that are difficult to explain concisely in a docstring especially if English is not your mother tongue. Struggling to find the right words or phrasing would make the process even less enjoyable and more time-consuming for me. 

Docstrings are essential for ensuring that the rest of the team understands the purpose and usage of each function. ChatGPT has simplified this process, allowing me to generate docstrings in Google's format with ease. This not only reduces the time spent on documentation but also ensures consistency and adherence to best practices if you write good prompts. 

The crazy thing is that ChatGPT has proven to be highly proficient and versatile, successfully generating accurate and informative docstrings not only for simple functions but also for complex decorator functions, it's been a game-changer in making my documentation process way more efficient.

Integrating ChatGPT, Python Annotations, and Sphinx for Seamless Documentation

After generating docstrings with ChatGPT (in a matter of seconds), I review, modify, and add them to their respective functions. To create a seamless documentation process, I also integrate Python annotations and Sphinx, a documentation generation tool. Here's what the workflow looks like:

  1. Python Annotations: While writing code, I add type hints using Python annotations to specify the expected input and output types for each function. This not only helps with code readability but also provides valuable information for generating more accurate and informative docstrings. 
    Example:
  2. ChatGPT Docstring Generation: Using a prompt that includes the function along with type annotations, I ask ChatGPT to generate a Google-style docstring for the function. This ensures that the generated docstring is consistent with the function's purpose and adheres to best practices. 
    Example prompt for ChatGPT: 
    Generate a Google-style docstring for the following Python function:
    
    def read_json(file_path: str) -> Union[dict, list, None]:
        if os.path.exists(file_path):
            with open(file_path, 'r') as file:
                file_content = file.read()
                if not file_content:
                    return None
                try:
                    data: Any = json.loads(file_content)
                except json.JSONDecodeError as e:
                    raise json.JSONDecodeError(f'Error decoding JSON file: {file_path}\n{str(e)}')
            return data
        else:
            raise FileNotFoundError(f'{file_path} not found')
  3. Sphinx Integration: I use Sphinx to generate well-structured and readable documentation based on the docstrings and annotations. Sphinx automatically extracts the information from the code, creating comprehensive documentation that includes function descriptions, input and output types, and any additional notes or examples.
  4. Automated Documentation Updates: To keep the documentation up-to-date, I set up a batch file or script that regenerates the documentation whenever changes are made to the code. This ensures that the documentation remains current and accurate, minimizing the need for manual updates.

By following this workflow, I can create high-quality and consistent documentation in a matter of minutes, leveraging the power of ChatGPT, Python annotations, and Sphinx to streamline the entire process.

The Challenge

ChatGPT has undoubtedly enhanced productivity in the software and game development realm, but it also brings forth a challenge: recognizing when to step back from work. The heightened efficiency sometimes makes it arduous for me to disengage from coding tasks and take much-needed breaks. As a technical artist, I constantly ponder the implications of this technology's advancements for our industry. Regardless of the outcomes, the influence of ChatGPT on productivity for those who adopt it is indisputable. Thus far, I've been able to achieve efficiency gains which have freed up more time for me to focus on creative pursuits and innovation in my projects.

I encourage you, to embrace ChatGPT and to try and integrate it into your development processes, exploring innovative and creative ways to incorporate this technology. Ignoring or fearing this technological wave is not the answer. As we collectively contemplate the implications of AI and the evolution of our jobs, it's vital to engage in open conversations, address emerging challenges, and seize opportunities for growth. 

Thanks for reading,  

Sergi

Resources

ChatGPT: https://chat.openai.com/

Sphinx: https://www.sphinx-doc.org/en/master/

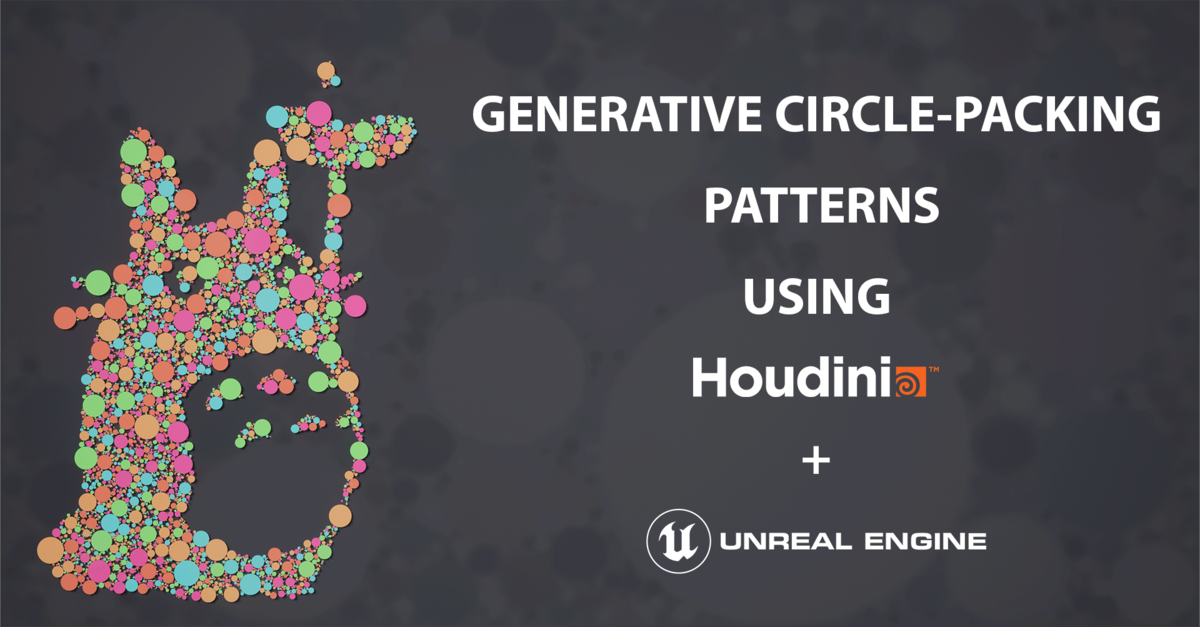
Generative Circle Packing Patterns Using Houdini and Unreal

Article / 12 March 2023

Introduction

Recently, I decided to explore the circle packing algorithm, which is a technique for placing circles in a space without overlapping. There are different interpretations and implementations of the algorithm that can produce different results, and in this article, I will share my experience on how I replicated my version of it in Houdini and rendered the results in Unreal to create hypothetical wallpapers. 

Circle-packing algorithms have a broad range of applications in computer graphics, including game development (distributing a set of objects without overlapping for example), visualization, and art, to name a few. 

These wallpapers demonstrate the capabilities and beauty of this algorithm. I hope they will inspire others to experiment and create their own artwork using this technique.

Results

After a few hours of problem-solving and experimenting with various techniques and parameters, I successfully generated and rendered a diverse set of wallpapers using my version of the circle-packing algorithm. I've attached them below for your reference.


The Process

Tools Used

  • Houdini. 
  • Unreal Engine 5.1

Description

Houdini's procedural scripting and modeling capabilities made it an ideal choice for this project, as I was able to replicate this with a couple of "Attribute Wrangle" nodes and a copy to points at the end to create the circles. I made my own algorithm inspired by Matsys Design's implementation with a couple of differences to fit my needs. 

The inputs are the following: 

  • Surface Polygon: Needs to be plugged into the subnetwork. 
  • Strict Outline: Should the algorithm consider the boundaries of the mask as a strict boundary or should it just use it as a guide, allowing some radii of some circles to go over.
  • Iterations: Not the number of circles, but the number of times it will attempt to add a new circle.
  • Maximum Radius: Maximum radius for the circles. 
  • Minimum Radius: Minimum radius for the circles.
  • Multiplier: This was to tweak the final overall radii of the circles but I ended up not using it. 

First, the algorithm gets the maximum and minimum radii from the parameters exposed in the subnetwork. Then, it gets the surface polygon and adds a circle of maximum radius to it making sure that it does not go over the limits. After that, in a detail wrangle, a random seed value is generated, and a new point is added to a random position on the surface. The radii attribute of each new point is assigned a random value within the range of the minimum and maximum radii.

Next, the distance between the new point and all the closest existing points is calculated. If the distance is smaller than the radius of one of the other points, it means that the new point is inside a circle and should be removed.

Afterward, the distance is compared again to see if it's bigger or smaller than the sum of the radius of the new point and the current point being analyzed. If it's bigger, the point is considered valid and added with the previously generated radii value. If the distance is smaller, it means that both circles would be overlapping, so I calculate the difference, and the radii value of the new point is adjusted.

Finally, depending on whether the outline should be strictly considered or not, the radius of the new circle is checked to see if it falls outside the mask. If it does, the size is reduced by an appropriate amount to make sure the circle stays within the designated boundaries. This process is repeated until the number of iterations is met. 

After this whole process, I have a bunch of points with a radii point attribute. The only thing left to do to visualize the results is to add a "Copy to Points" node using the radii as a scale for the circles. 

The cool thing is that you can drop the same wrangles inside a solver to visualize the process as a sequence.

After generating the circles, I assigned a random value of red to each circle from a pre-defined list of values (0.2, 0.4, 0.6, 0.8, and 1) which was stored in the vertex color. I then exported the circles and imported them into Unreal Engine.

To add more visual appeal to the circles, I created a basic material inside Unreal that reads the vertex color of each circle and uses it as an index to pick from a color palette. By utilizing this technique, I was able to experiment and iterate with various colors, lighting, and camera setups to create a variety of wallpapers that showcase the beauty of this algorithm. 

Conclusion

Overall, I had a lot of fun exploring this topic and experimenting with different techniques and parameters in Houdini. I find the results to be visually very satisfying, and I had a lot of fun figuring out the whole process as well as playing with colors, silhouettes, and shapes.

The images I have attached to this post are fairly high resolution so feel free to use them as wallpapers for your PC, laptop, and mobile devices. 

If you're interested in exploring circle-packing algorithms, I highly recommend giving it a try. And if you made it this far, thank you for reading!

Resources

Python, Pydantic and Validating JSON Files for Game Development

Article / 18 February 2023

Introduction 

As video games get increasingly complex, and with productions and projects handling huge amounts of data for next-gen games, it's essential to have a way to store and validate game data in an organized and efficient manner, especially, when sending this data across different DCC (Digital Content Creation) packages. JSON (JavaScript Object Notation) is a lightweight data-interchange format that has become a popular choice for storing some of this data. 

Data inaccuracies can be extremely disruptive to tools and pipelines, not to mention the frustration that comes with manually coding validation functions to safeguard your data's integrity. In this article, we'll explore how to use Python and the Pydantic library to validate JSON files.

Topics Covered

  • Setting up Pydantic
  • Creating models
  • Validating JSON files with Pydantic

Disclaimer

  • Some basic Python knowledge is needed. 
  • If you like how classes are written with pydantic but don't need data validation, take a look at the dataclasses package.
  • Pydantic is a very versatile library and offers a huge set of tools, I will only be covering the basics to get you started.  

Setting up Pydantic 

Pydantic is a Python library that validates data structures using type annotations. It simplifies working with external data sources, like APIs or JSON files, by ensuring the data is valid and conforms to expected data types. To get started with Pydantic, we'll need to install it using pip. I will be working with PyCharm in a Virtual Environment so you can do one of the following:

  • Ctrl + Alt + S to open Settings. Look for Python Interpreter, click the + icon, search for pydantic, and click Install Package.

        or

  • Go to the terminal and run pip install pydantic.

Creating Models

With Pydantic installed, we can now create models for our data. In Pydantic, models are Python classes that define the structure of the data we want to validate. 

For example, let's say we have a game with different types of assets, and we want to store information about each one of them in a JSON file. Let's also assume that one of the things we want to store from our asset is the bounds of the asset.

Let's create first a model for our bounds vector:

In this example, we can already see a few things, defining the class is extremely clean and simple compared to how it would be with a default Python class:

Using Pydantic for defining classes in Python can make code more concise, less error-prone, and easier to maintain compared to defining classic classes. With Pydantic, you define a class inheriting from BaseModel, and Pydantic generates the __init__ method for you based on the class attributes. You also get a human-readable representation of the object by default, and you can customize it using the __str__ method if needed. This can save you time and effort compared to defining the __init__ and __repr__ methods manually in a classic class.

Now let's create our Asset class. For JSON validation, the model attributes should match the data stored in your JSON:

In this example, we have created a class GameAsset that inherits from BaseModel with a few different annotations:

  • id (str): Unique ID for each asset using the UUID library. 
  • source_path (FilePath): String that contains the path to the source of this game asset. 
  • game_asset_path (FilePath): String that contains the path to the game asset. If we were working in UE for instance, it would point to a .uasset.  
  • type (str): String defining what type of asset this is, for example, a 'Rock'.
  • bounds (CustomAssetBounds): This stores an instance of our custom asset bounds class. 
  • jira_task (HttpUrl): This could store the link to the Jira task for this asset. It is just an example to showcase different pydantic features. 

The type annotations tell Pydantic what type of data to expect in each field. 

Let's now create a GameAsset object: 

Now so far this sounds great but probably boring, and other than cleaner code, there seems to be no other advantage. If we run the code we get our object printed.

Pydantic's true power becomes apparent when we introduce errors into our data. Let's change one of the paths for one that does not exist in our project and let's run the code again.

As we can see, we receive an automatic validation error. Out of the box. Similarly, we can easily test other annotations such as HttpUrl or float, and Pydantic will raise errors if the values provided do not conform to the expected format. The ease of use and built-in data validation make Pydantic a valuable tool for developing robust and reliable code in Python.

Validating JSON Files with Pydantic 

With our models defined and essential features highlighted, let's move on to a more complex example to explore some of Pydantic's capabilities. Suppose we have a hypothetical JSON file containing asset data named city_assets.json:

Note that the data presented in the city_assets.json file in the following example does not represent any meaningful or relevant information. It serves only to demonstrate how Pydantic can be used to validate and process data in a Python program. 

We can use the following code to validate this JSON file with Pydantic:

In this code, we expand our GameAsset class that represents a game asset and contains information about its identity, location, type, and bounds. The class still has attributes such as an ID, the path to the source file for the asset, the path to the asset within the game directory, the type of asset, the bounding box dimensions, and a Jira task URL. It also includes a custom error message that is raised when the source path is not an FBX file.

The pydantic library is used to define data validation on the GameAsset attributes, where I introduce the validator decorator which ensures that the source_path attribute is validated by verifying that it is a valid .fbx file.

Subsequently, we retrieve the data stored in a JSON file named city_assets.json and leverage the GameAsset class, along with list comprehension, to generate a collection of GameAsset objects from the retrieved JSON data.

List comprehensions are a concise way of creating lists in Python. They allow you to generate a new list by applying an expression to each item in an existing iterable, such as a list or a range. The basic syntax of a list comprehension is as follows: 

new_list = [expression for item in iterable if condition]

Here, expression is the operation or calculation to be performed on each item in the iterable. The if statement is optional, and allows you to filter the results by a condition.

For example, let's say you have a list of numbers and you want to create a new list with the squares of those numbers. You could use a for loop to do this as follows:

numbers = [1, 2, 3, 4, 5]
squares = []
for number in numbers:
    squares.append(number ** 2)

Using a list comprehension, the same result can be achieved in a more concise way: 

numbers = [1, 2, 3, 4, 5]
squares = [number ** 2 for number in numbers]

Conclusion 

Pydantic is a powerful tool for validating JSON files and data in general in game development. By using models and type annotations, we can ensure that our data is well-organized and consistent. It allows us to create classes that describe data structures and easily define defaults, making it easier to maintain and modify classes. It also offers attribute customization and error handling with user-friendly error messages. It provides helpful helper methods to export models such as json(), dict() and to create JSON Schemas with schema().

In addition, Pydantic is known for its speed and efficiency due to its use of advanced parsing and validation techniques. Pydantic uses Python's type annotations to create a fast, low-overhead validation system that can quickly and accurately check that data conforms to a specific structure. 

However, Pydantic's validation only checks whether the data has the expected types and constraints; it does not check whether the data itself is intrinsically correct. For example, if we take the Pydantic model GameAsset we created in the example and look at the attribute game_asset_path, Pydantic will only check whether the value passed to that attribute is a valid FilePath, but it won't check whether the file itself is a valid game asset path or not. This means that if the data passed to Pydantic has the correct data types and adheres to the constraints defined by us, Pydantic will consider it valid, even if the data itself is incorrect or inappropriate.

To ensure that the data content is also correct, we must perform additional checks and validations, beyond the ones provided by Pydantic using the @validator decorator for example. 

With all of this in mind, whether you are creating a small indie game or a large AAA title, using Pydantic for data validation is a great way to ensure your data is reliable and well-organized. By combining Pydantic with additional checks and validations, we can exchange data between different DCC packages with accurate, appropriate data that provides the best possible user experience for developers and artists.

Resources

Houdini Scripted Menus. Making your HDA's Menus Dynamic.

Article / 06 March 2022

Introduction 

Imagine we were building a tool in Houdini to generate houses for our project. While developing the tool, Art Direction still hasn't decided how many different types of houses the project will need. One thing you know for sure: later in production, you won't have time to open and publish a new version of the tool every time a new item needs to be added to the UI.

Topics Covered

  • Setting up the "Python Module" for a Digital Asset. 
  • Generating a basic .json file. 
  • Linking its contents to an "Ordered Menu". 

Overview

Adding drop down menus to our Digital Assets is nothing new. However, having to set it up using Labels and Tokens can be a painful process. In this short post, I will go through the process of setting up a menu  for our Digital Asset that is dynamic and that doesn't require modification when a new item needs to be added. 

It is just a small glimpse of what is possible, writing a .json file does not necessarily need to be manual work. This process could be automated. 

Disclaimer

  • Some basic Python knowledge is needed. 
  • I don't go over how to create Houdini Digital Assets. 
  • There are many ways of doing this. This is just one of those ways. 

Creating Dynamic Menus

1. Generating a very basic .json file.

The goal in this step is pretty straight forward. Pick a directory in your source control or PC where this file will be stored. 

1.1. Create a new file.

You can name it whatever you want. For this demonstration, I have created mine in:

..\Documents\houdini19.0\digital_asset_menus\my_menus.json

1.2. Adding content to our .json file.

Open the file and create a new entry, the key will be the name of your Digital Asset Definition, and inside, the contents of our menu. 

Now let's jump into Houdini. 

2. Adding the "Python Module" to our Digital Asset

Open your Houdini Digital Asset Properties and go to the "Scripts" tab. At the bottom right you will see drop down menu called "Event Handler". Click on it and select "Python Module". A new item will be added to the "Scripts" table above. 

In the empty text field, we will need to import the Python json module that will allow us to parse the data stored in the .json file we previously created. We will also need to store the path to the .json file in a constant variable. Next, let's add a couple of functions to our "Python Module":

3. Setting up the menu

Once we are done with setting up our HDA's "Python Module", let's head back to the "Parameters" tab and add a new parameter of type "Ordered Menu". 

With our new parameter selected, click on the "Menu" tab. 

By default, the "Menu Items" option will be selected. As we mentioned at the beginning, adding, modifying and maintaining such menu can be tedious and requires the tool to be opened, modified and published every time a new item needs to be added to the list. Instead, we will select "Menu Script" and write some more code. 

Final Result

Following our initial example, if at some point during production we were to add a new type of house called "Spanish", all we would have to do is add a new line to our .json and we would instantly see the menu update itself without modifying anything in our Houdini tool.

Final notes

As I mentioned at the beginning, this is just a very simple example. Json files can get way more complex than what we saw, and it's not only limited to this. You could scan directories and return a list of .fbx files, images and a lot more.  The main point to take from this read is that you can write some Python code to drive and fill up menus in you Digital Assets to make your life easier. 

Resources

Koch Snowflake using VEX

Article / 20 June 2021

Introduction

I will be starting a blog series on the development of short exercises. They won't be a step by step tutorial, but I do plan to show as much as possible. In terms of what to expect, most of the times they will be things that I got obsessed with after reading some book or article (fractals in this case), and I will try to use as much code as possible. There are a few stages when it comes to learning Houdini, but the one that seems to be the most daunting is learning VEX. Sadly VEX is the one that uncovers its full potential.

Topics covered

  • Creating the equilateral triangle using two methods: 
    • Using just VEX. 
    • Inspired by technical drawing and taking advantage of some of Houdini´s "programming free" nodes.
  • VEX code to generate the Koch snowflake inside Houdini's "For each loop" using the "Fetch Feedback" method.  
  • Connect the dots to thus create the geometry using VEX.

Overview

The Koch snowflake can be generated by starting with a shape with linear curves or segments, then recursively altering each line segment as follows:

  1. Divide the line segment into three segments of equal length.
  2. Draw an equilateral triangle that has the middle segment from step 1 as its base.
  3. Remove the line segment that is the base of the triangle from step 2.

The Koch snowflake is the limit approached as the above steps are followed indefinitely.  

In my case, I will be starting from an equilateral triangle which is the most common case,  but you can download the file and change the input for any custom curve you want and it will work. 

My approach

1. Constructing the equilateral triangle:

 In this step and as mentioned above, the goal is to construct an equilateral triangle. I decided to do it using two different approaches, one being pure VEX, and the other one inspired by the "Technical Drawing" subject I had back in high school where for a while we would use a compass and the circles and arcs it creates to accomplish more complex shapes. 

2.1. Math approach:

First I created two points in the 3D space where I knew I would only modify the X value, and I made it so that the two points are always equidistant by getting only one x input value from the exposed vector parameter, and multiplying the second point by negative one.

After that I applied the Pythagorean Theorem and as easy as that we got ourselves an equilateral triangle.

2.2. Technical drawing approach:

In this approach, the result is the same, but I tried to replicate the compass method of creating the triangle given a segment of length n and a compass: 

  • In step one, we place the compass on point 0 and measure the distance to point 1, then swing an arc of this size above the segment. In my case I got the distance between those two points, and gave each point the "pscale" attribute (to replicate the diameter). 
  • Step two would be to do the same on point 1, until both arcs are intersecting. In my case, I used the "Copy to Points" nodes, which resizes the circle thanks to the attribute we set above.
  • After that I run an "Attribute Wrangle" on "Primitives" to separate them into groups. 
  • Using the "Intersection Analysis" node we get the points of intersection. For our particular example all that's left is to remove the bottom point and merge it back with our initial two points to get the same equilateral triangle.

3. For each loop using fetch feedback:

Here's where I actually go over the points to create the position for each point on the final snowflake. The step followed are the ones I mentioned in the beginning of this post. Here's a more detailed explanation:

  1. I compute the position of 3 points. To know where they are, a bit of vector knowledge is needed. Starting from the unmodified segment being analyzed, we calculate the tangent between the next point and the current point, and we add a third of that value or 2 thirds to get a new segment. 
  2. To draw an equilateral triangle that has the middle segment from step 1 as its base, we do the same process as step 1, but we add to the current point half of the size of the current segment. After that, we use the Pythagorean Theorem again to find the height of the new equilateral triangle, and using the tangent and the front vector, we do the cross product to know in which direction that point is. 
  3. We can finally add the points in order, and remove the current point (because we just created a duplicate on top). 

4. Polyline creation:

In this final step I used the "addprim" VEX function. Running a new "Attribute Wrangle" over "Points", I fed the function with the current point and the next one, and that's how we get our final "Koch Snowflake". 

If instead of adding the height outwards, we subtract it, we get the inversed "Koch Snowflake". 

Conclusion

I've had a lot of fun with this exercise, and fractals is a topic that I find fascinating so I will dig more into them in the future. I went one step ahead, and exported a bunch of fractals to UE5 to render them with Lumen just because :) If you are starting with Houdini and VEX, I hope that you’ve learned something  and if you have any questions, feel free to send me a message and I’ll do my best to help. 

I want to get the file: https://github.com/secarri/KochSnowflake

Thanks for reading,  

Sergi