Introduction
Imagine we were building a tool in Houdini to generate houses for our project. While developing the tool, Art Direction still hasn't decided how many different types of houses the project will need. One thing you know for sure: later in production, you won't have time to open and publish a new version of the tool every time a new item needs to be added to the UI.
Topics Covered
- Setting up the "Python Module" for a Digital Asset.
- Generating a basic .json file.
- Linking its contents to an "Ordered Menu".
Overview
Adding drop down menus to our Digital Assets is nothing new. However, having to set it up using Labels and Tokens can be a painful process. In this short post, I will go through the process of setting up a menu for our Digital Asset that is dynamic and that doesn't require modification when a new item needs to be added.
It is just a small glimpse of what is possible, writing a .json file does not necessarily need to be manual work. This process could be automated.
Disclaimer
- Some basic Python knowledge is needed.
- I don't go over how to create Houdini Digital Assets.
- There are many ways of doing this. This is just one of those ways.
Creating Dynamic Menus
1. Generating a very basic .json file.
The goal in this step is pretty straight forward. Pick a directory in your source control or PC where this file will be stored.
1.1. Create a new file.
You can name it whatever you want. For this demonstration, I have created mine in:
..\Documents\houdini19.0\digital_asset_menus\my_menus.json
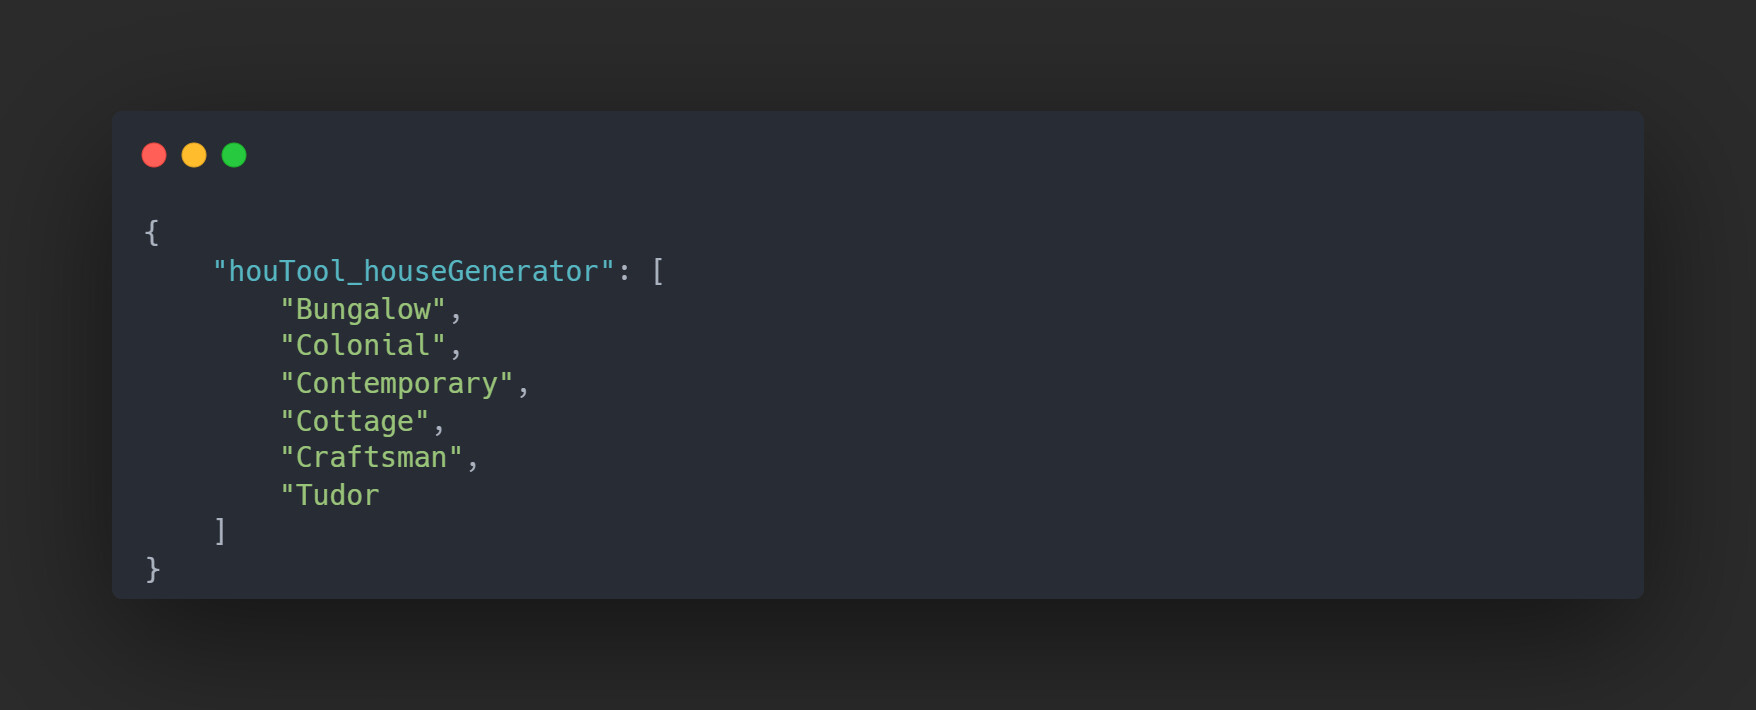
1.2. Adding content to our .json file.
Open the file and create a new entry, the key will be the name of your Digital Asset Definition, and inside, the contents of our menu.
Now let's jump into Houdini.
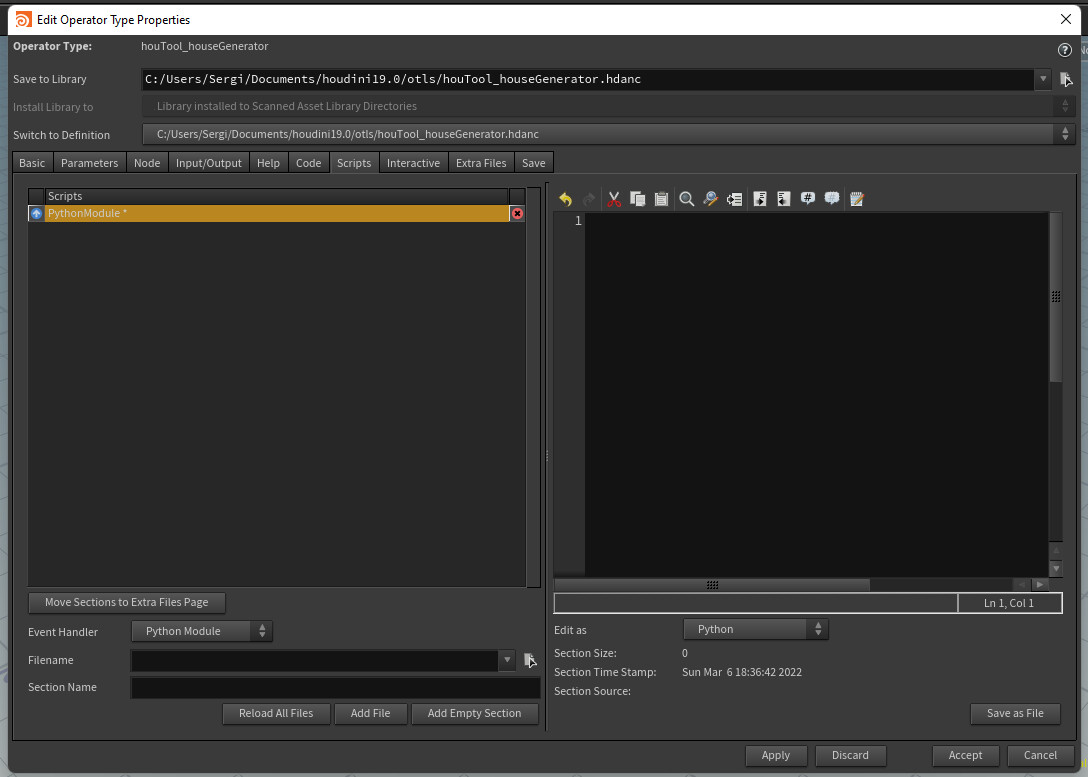
2. Adding the "Python Module" to our Digital Asset
Open your Houdini Digital Asset Properties and go to the "Scripts" tab. At the bottom right you will see drop down menu called "Event Handler". Click on it and select "Python Module". A new item will be added to the "Scripts" table above.
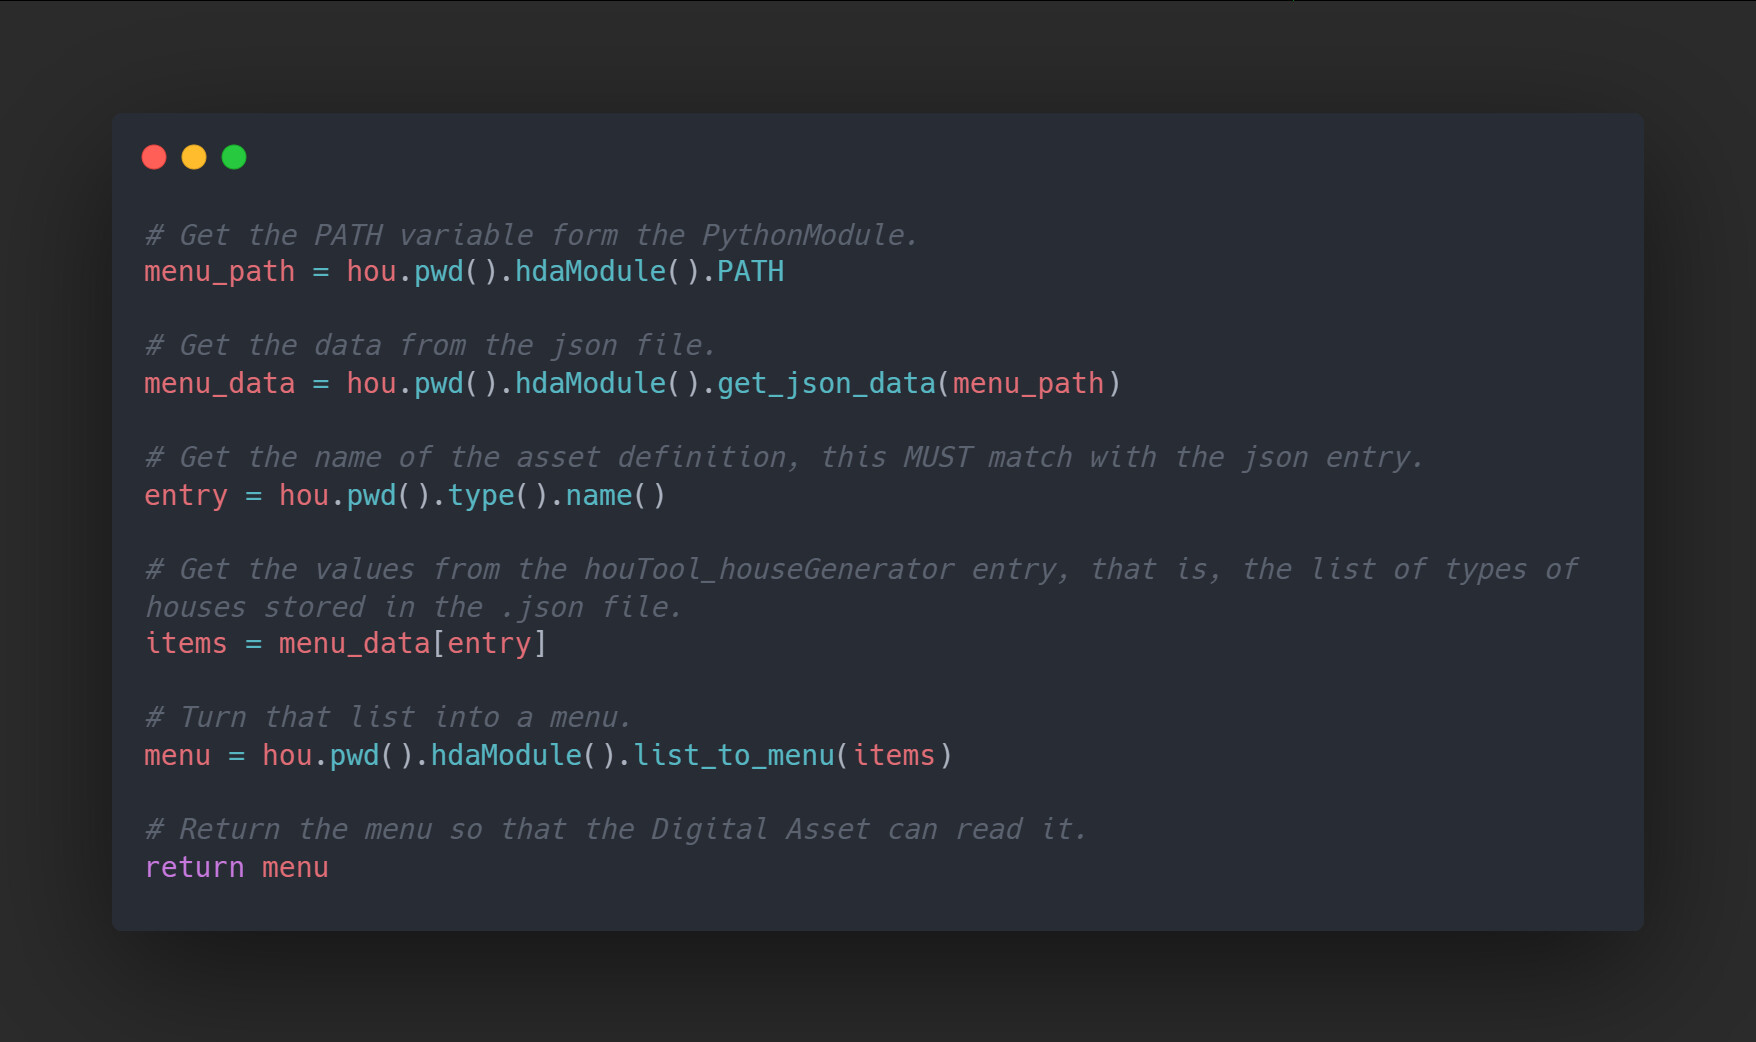
In the empty text field, we will need to import the Python json module that will allow us to parse the data stored in the .json file we previously created. We will also need to store the path to the .json file in a constant variable. Next, let's add a couple of functions to our "Python Module":

3. Setting up the menu
Once we are done with setting up our HDA's "Python Module", let's head back to the "Parameters" tab and add a new parameter of type "Ordered Menu".
With our new parameter selected, click on the "Menu" tab.
By default, the "Menu Items" option will be selected. As we mentioned at the beginning, adding, modifying and maintaining such menu can be tedious and requires the tool to be opened, modified and published every time a new item needs to be added to the list. Instead, we will select "Menu Script" and write some more code.
Final Result
Following our initial example, if at some point during production we were to add a new type of house called "Spanish", all we would have to do is add a new line to our .json and we would instantly see the menu update itself without modifying anything in our Houdini tool.
Final notes
As I mentioned at the beginning, this is just a very simple example. Json files can get way more complex than what we saw, and it's not only limited to this. You could scan directories and return a list of .fbx files, images and a lot more. The main point to take from this read is that you can write some Python code to drive and fill up menus in you Digital Assets to make your life easier.
Resources
- What else can I do with the json Python module: https://docs.python.org/3/library/json.html
- Retrieving information from a Digital Asset with Python: https://www.sidefx.com/docs/houdini/hom/hou/HDASection.html
- What is hou.pwd(): https://www.sidefx.com/docs/houdini/hom/hou/pwd.html